
Battery Terminal Corrosion: When to Clean or Replace
Learn which battery terminal damage needs replacement, how to clean intact posts and clamps, and the correct disconnect order for negative-ground vehicles.
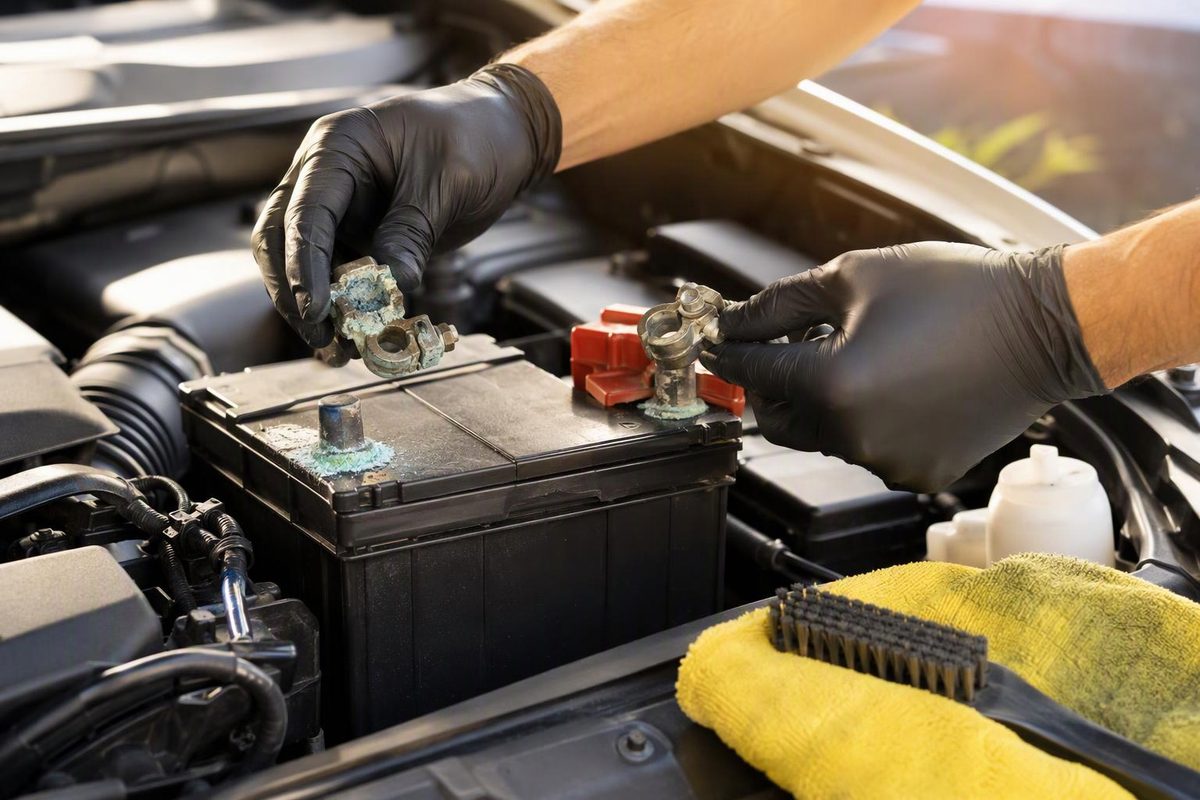
For a corroded battery terminal, clean removable surface buildup; replace damaged connectors or cables that cannot make a secure connection. A cracked battery case or suspected acid leak needs inspection before cleaning. Corrosion alone does not prove the battery has failed.
Select the condition of the battery, connector and cable to find the next step.
Battery Connection Decision
Clean, Then Reinspect
For an intact lead-acid battery with surface buildup and a sound cable, clean the post and the inside of the clamp. Dry thoroughly, inspect for hidden damage, then reconnect to the applicable specification.
If starting trouble remains after restoring a secure connection, have the battery, cables and charging system checked.
Source: AutoZone cleaning and inspection guidance and NOCO cable inspection guidance. This decision is not a battery health test.
A battery terminal is the battery’s electrical connection point; the cable clamp or connector attaches the vehicle’s wiring to it. Parts listings often also call the cable-end clamp a “terminal.” That distinction matters when buying a replacement: cleaning a battery post, replacing a cable connector and replacing the battery are different jobs.
Identify polarity by the battery’s + (positive) and − (negative) markings—not cable color alone. Red usually indicates positive and black negative, but verify the markings before working. Interstate Batteries explains terminal identification and safe cable handling.
Surface Corrosion Can Be Cleaned; Structural Damage Cannot
With the ignition off, inspect the battery case, connectors and nearby cable insulation before loosening anything. Look beyond the colored deposit: the decision depends on whether the underlying parts remain intact and can make a secure connection.
| What You Find | Appropriate Next Step |
|---|---|
| White, blue or green buildup on an otherwise intact post and clamp | Clean the post and clamp’s contact surfaces, then inspect again. |
| Loose clamp, with no visible damage | Check seating and fit; tighten to the specified torque. |
| Cracked, badly eroded or distorted clamp | Replace the damaged connector with a vehicle-compatible part. |
| Connection remains loose after correct installation | Replace the damaged connector; do not keep tightening it. |
| Frayed strands, damaged insulation or corrosion at the wire entry | Have the cable repaired or replaced. |
| Cracked case or suspected acid leakage | Stop routine cleaning and have the battery inspected for replacement. |
AutoZone advises replacing terminals that remain too damaged after cleaning and inspecting suspected acid leaks before cleaning. NOCO’s inspection guide identifies damaged cables that need replacement.
Surface buildup can hide the condition of a clamp. If the case is intact and there is no suspected leak, remove the buildup before making the final judgment about the connector underneath. Cleaning is the first step in inspection, not a promise that the part is reusable.
A clean connector that is cracked, distorted or badly eroded still needs replacement. Likewise, a clean battery post does not solve frayed cable strands or damaged insulation. Keep the repair focused on the damaged component rather than treating every connection problem as a failed battery.
A Loose Clamp Needs a Fit Check Before More Tightening
A loose connection is not automatically a reason to discard the connector. First check that it is correctly seated and is the right part for the connection. Then tighten it to the applicable specification.
If it remains loose after correct installation, more force is not the next step. The connector may be damaged or unsuitable for that battery connection. Do not grind away metal to make a mismatched clamp fit, and do not use “as tight as possible” as a substitute for the specified torque.
This draft’s sources do not establish a universal terminal torque. Use the vehicle or connector specification for the exact arrangement you are servicing. A torque value for one connector does not establish the value for another.
Cable Damage Changes the Repair
Inspect where the wire enters the connector as well as the connector itself. Corrosion at that entry point, frayed strands, or cracking and peeling insulation calls for cable assessment. Cleaning only the battery post leaves that damage unaddressed.
A replacement clamp must match the connection—not just look similar. Top-post clamps, side-terminal bolt connections and threaded-stud connections are different arrangements. For connector selection and cable repair options, see battery and cable connector types and fitment.
When buying parts, distinguish between damage to a removable cable connector and damage to the battery’s own connection point. A new cable clamp does not repair a damaged battery post. If the battery connection itself appears damaged, have it inspected rather than assuming a clamp replacement will resolve it.
Disconnect Negative First; Reconnect Positive First
For a conventional 12 V, negative-ground vehicle, disconnect the negative (−) cable first, then the positive (+) cable. Reconnect in the opposite order: positive first, then negative.
This is the sequence in OPTIMA’s automotive installation instructions. It is not a jumper-cable procedure or a high-voltage hybrid/EV service procedure. Do not apply it to an unfamiliar electrical system without checking the vehicle’s instructions.
Before disconnecting, consult your vehicle manual for shutdown waiting periods, access instructions and required resets. For example, this Ford Mustang battery procedure requires at least two minutes after switching off before disconnection and lists features needing a reset. That waiting period belongs to the cited Mustang procedure; it is not a universal rule for all cars.
Do not assume another vehicle needs a memory saver or uses the same reset procedure. Resolve those requirements before removing a cable, rather than discovering them after the battery is disconnected.
Wear safety goggles and gloves, remove metal jewelry, and work with good ventilation. Never bridge the two terminals with a tool or let a tool on the positive connection touch vehicle metal. Secure disconnected cables so they cannot spring back onto the posts.
Keep sparks, flames and smoking away. Battery gases can cause an explosion, as OPTIMA’s safety warning explains. A small cleaning job still involves an exposed battery connection; corrosion does not remove the electrical or chemical hazards.
Clean the Post and the Inside of the Clamp
The following cleaning process applies to an intact lead-acid battery with surface corrosion. A cracked case or suspected acid leak belongs on the inspection path, not the routine-cleaning path.
Disconnect According to the Vehicle Procedure
Switch off the vehicle and follow its shutdown and access instructions. For the conventional 12 V, negative-ground arrangement described above, remove the negative cable before the positive cable.
Keep each disconnected cable clear of its battery connection. The work area needs to remain disconnected while you clean; a cable that springs back into place defeats that precaution.
Apply Cleaner Without Flooding the Battery
Use a battery-terminal cleaner according to its label. Alternatively, mix baking soda and water separately and apply it sparingly with a brush or cloth. The draft does not provide a mixing ratio, so there is no supported numerical recipe to use here.
Do not pour the mixture over the battery. Keep it out of cells, vent openings and nearby electrical components. The aim is controlled cleaning of the affected connection, not washing the whole battery in cleaning solution.
Remove Buildup From Both Contact Surfaces
Clean the battery post and the inside of the cable clamp, not only the visible outside. Removing the colored deposit from the exterior can leave buildup on the surfaces that meet when the connector is installed.
Use a terminal brush gently. Cleaning should expose the condition of the existing parts, not reshape them. If a connector will only fit after grinding away metal, stop and check the connector’s compatibility rather than treating that as part of corrosion removal.
Once the deposit is removed, inspect the metal again. A crack or badly eroded section that was hidden under buildup changes the decision from cleaning to replacement. Do the same at the cable entry: a clean clamp does not make damaged wire serviceable.
Dry Before Reassembly
Wipe away residue and dry the cleaned parts thoroughly before reconnecting. Reinspect the case, post, clamp and cable while the connection is still apart.
This is the point to decide whether the connector can be reused. If it is intact and correctly matched, proceed with installation. If it is cracked, distorted or badly eroded, replace it rather than assembling it and hoping tightening will compensate.
Reconnect, Then Apply Exterior Protection
Reconnect positive first and negative last for the conventional negative-ground arrangement. Seat each connector correctly and tighten to the applicable vehicle or connector specification. Do not force or overtighten the connection.
Refit terminal covers and apply terminal protectant as directed. If using dielectric grease as an exterior corrosion barrier, apply it after assembly, not between the post and clamp, as Interstate recommends.
Cleaning, fastening and protection have separate roles. Cleaning removes buildup from the contact surfaces; correct assembly establishes the connection; exterior protection is applied afterward. Protectant is not a substitute for removing deposits or replacing a connector that cannot stay secure.
Recheck the Connection Before Replacing the Battery
After cleaning and correct installation, the connector should no longer have the looseness that prompted the repair. If it remains loose, revisit seating, compatibility and damage rather than repeatedly tightening it.
The visible result also matters. A shiny exterior does not establish that the inside of the clamp was cleaned, and a new connector does not establish that the cable behind it is sound. Check the part you worked on and the adjacent cable as separate items.
Do not replace the alternator—or the battery—solely because one terminal is corroded. Interstate’s cleaning guidance notes that corrosion alone does not establish battery failure; an actual battery test is needed. The appearance of the deposit is a reason to inspect and clean the connection, not a battery-test result.
If a clean, secure connection does not restore normal starting, have the battery tested and the cables and charging system checked. Our battery-versus-alternator diagnostic guide explains how to separate those faults before buying parts.
If corrosion returns, reassess the battery case, connector and cable instead of automatically repeating the same repair. Suspected leakage still needs inspection before cleaning, and newly visible cable damage still requires repair or replacement. Recurring buildup alone does not identify which component has failed.
Replace Only the Component the Inspection Supports
The practical dividing line is whether the connection remains intact and secure after cleaning and correct installation. Removable deposits on sound parts support cleaning. Structural damage to a connector supports connector replacement. Damaged cable strands or insulation support cable repair or replacement.
A cracked case or suspected acid leak requires battery inspection before routine cleaning. Starting trouble that remains after restoring the connection requires testing, not a diagnosis based on corrosion color.
Use the correct part for the vehicle’s connection arrangement and its specified installation procedure. That keeps a surface-cleaning job from becoming an unnecessary battery purchase—and prevents a damaged cable or clamp from being hidden beneath a freshly cleaned terminal.