
A Trickle Charger Can Charge a Serviceable Dead Battery
Some chargers may stop detecting a battery around 8-10 volts, but that range is not universal and does not diagnose battery health.
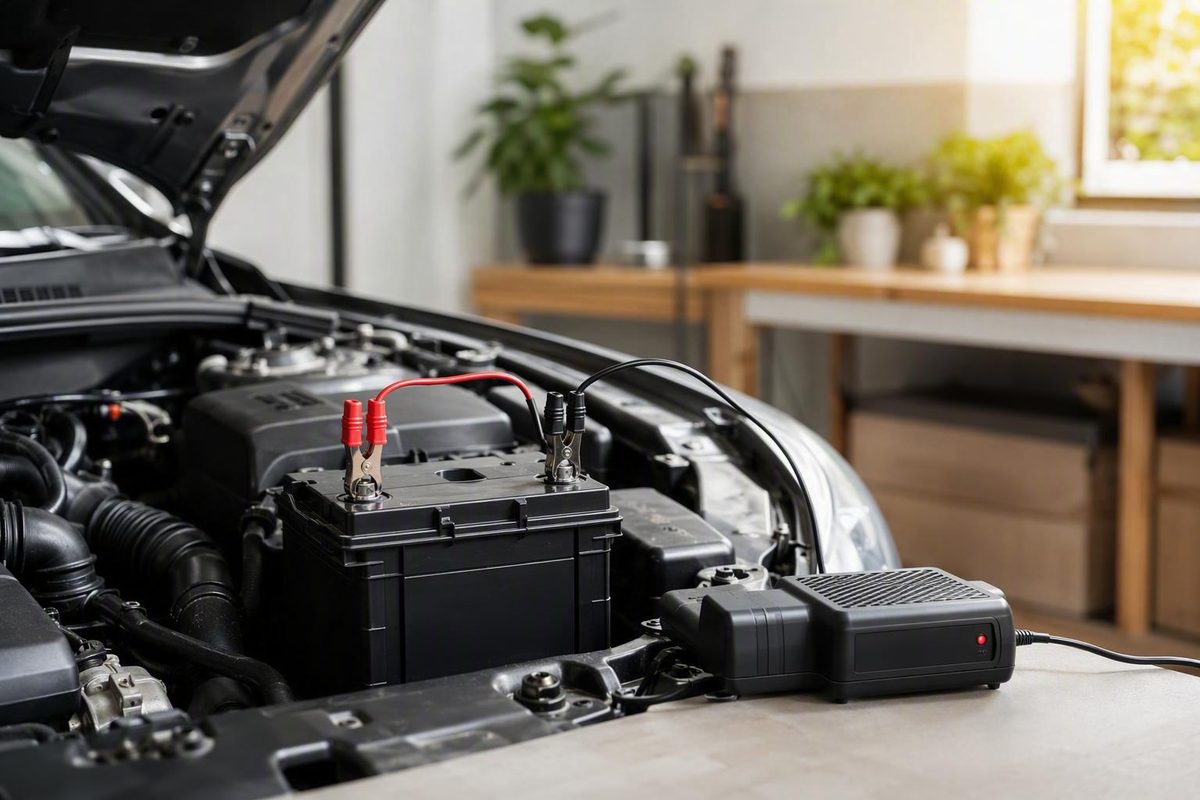
The short answer: yes, but only if the battery is still serviceable
A trickle charger can charge a dead battery when “dead” means discharged and the battery can still accept and retain a charge. It cannot repair a cracked, internally damaged, badly degraded, worn-out, or otherwise failed battery.
The word dead describes a symptom, not a diagnosis. A battery that will not start an engine might be:
- Partly discharged but otherwise healthy
- Deeply discharged and potentially damaged
- Below an automatic charger’s detection range
- Able to accept charge but unable to retain useful capacity
- Permanently failed
That distinction explains why apparently similar batteries can respond differently to the same charger. One may recover after a long, low-current charge. Another may reach a higher voltage or trigger a “complete” light but fail as soon as the starter demands substantial current.
Charging and repairing are not the same thing. Charging restores electrical energy; it does not reverse physical damage or every form of permanent capacity loss. Commercial battery guidance similarly distinguishes a discharged battery that may recover from one that has reached the end of its useful life or can no longer hold charge (R&D Batteries’ overview of trickle charging).
A trickle charger is also slow. It is most useful when there is no urgency or when the goal is maintaining a stored battery. If the vehicle is needed soon, a compatible standard charger will generally be more practical. A jump starter can provide temporary cranking assistance, but it does not fully recharge the battery or establish that the battery is healthy.
Use this quick decision guide:
| Battery condition and immediate need | Sensible next step |
|---|---|
| Safe, compatible, and merely discharged | Slow charging may work if time is available |
| Safe but deeply discharged or not detected | Check the charger’s documented low-voltage behavior or obtain professional testing |
| Vehicle must be moved immediately | Consider an appropriate jump starter, then recharge and test the battery |
| Faster recovery is needed | Use a compatible standard charger within manufacturer limits |
| Battery is damaged, frozen, leaking, swollen, or abnormally hot | Stop; do not attempt routine charging |
| Battery accepts charge but cannot retain it or perform under load | Replace it and seek authorized local handling or disposal guidance |
Successful recovery means more than seeing a higher voltage, a green charger light, or one successful start. The battery must retain charge and deliver adequate starting performance afterward.
Before charging: decide whether the battery is safe to attempt
Do not begin by attaching the charger. First inspect the battery, its surroundings, the cables, and the charger.
1. Look for reasons to stop
Do not attempt routine charging if the battery is:
- Frozen or suspected of having frozen
- Cracked, split, or punctured
- Leaking
- Swollen, bulging, or distorted
- Excessively hot
- Producing an unusual or strong odor
- Otherwise visibly damaged
Battery Tender’s manufacturer guidance advises against charging a frozen lead-acid battery until it has thawed and been inspected, and it identifies ventilation and battery-condition checks as important precautions (Battery Tender’s charging and safety guide).
A visibly damaged or abnormal battery is not a routine recovery project. Keep it away from ignition sources and seek qualified guidance on testing, replacement, and authorized local handling.
Stop charging if you notice rapidly increasing heat, swelling, leakage, cracking, an abnormal odor, recurring charger faults, reversed-polarity warnings, unexpected shutdowns, or no reasonable progress. Follow the applicable charger and vehicle instructions when shutting down and disconnecting.
2. Make the area suitable for charging
Lead-acid batteries can release flammable hydrogen while charging. Use a suitably ventilated location away from flames, sparks, smoking materials, and other ignition sources.
The charger also needs a stable, dry location where its heat can dissipate as intended.
3. Identify the battery before choosing a charger
Check the battery label and available documentation for:
- Chemistry or construction
- Nominal voltage
- Capacity, if listed
- Whether it is flooded lead-acid, AGM, gel, lithium, or another type
- Charging restrictions or required modes
Do not assume that batteries sharing the same nominal voltage use the same charging program. Flooded lead-acid, AGM, gel, and lithium batteries can require different charging limits and control strategies. Commercial charger guidance warns that the charger must match the battery chemistry and that a lead-acid charger may be inappropriate for a lithium battery.
If the label is unclear, use the vehicle manual, battery documentation, or part number—or have the battery identified professionally. Do not guess.
4. Check the vehicle and charger instructions
A generic online instruction should not override the vehicle or charger manufacturer.
The decision now divides into three branches:
- Unsafe, frozen, or damaged: Stop. Do not attempt routine charging.
- Safe but deeply discharged or not recognized: Check the charger’s documented detection range and supported recovery procedure.
- Safe, compatible, and recognized: Proceed according to the applicable instructions while monitoring the charger and battery.
Trickle charger, smart maintainer, standard charger, or jump starter?
First identify the problem you are trying to solve:
- Emergency starting: Provide enough temporary power to crank the engine.
- Recovery charging: Restore energy to a discharged battery.
- Storage maintenance: Offset discharge while a vehicle sits unused.
Those goals call for different equipment.
| Device | Typical role | Relative charging speed | Automatic regulation | Supervision needs | What it does not prove |
|---|---|---|---|---|---|
| Traditional trickle charger | Slow charging or basic maintenance | Very slow | Often limited or absent | Usually requires monitoring | That the battery is healthy or safe for indefinite connection |
| Smart charger | Controlled recovery and charging | Varies by model and mode | Usually adjusts current or charging stage | Lower burden, but correct setup and inspection remain necessary | That cycle completion means useful capacity has returned |
| Automatic maintainer | Long-term storage maintenance | Very slow by design | May reduce, stop, cycle, or enter maintenance mode | Follow the manufacturer’s extended-use rules | That it can recover every deeply discharged battery |
| Standard charger | Initial recovery when time matters | Generally faster | Manual or automatic, depending on model | Depends on design | That faster charging can repair a failed battery |
| Jump starter | Temporary starting assistance | Not a full charging process | Product-dependent | Follow product and vehicle instructions | That the battery is recharged or serviceable |
Traditional trickle charger
A traditional trickle charger supplies a low current, often continuously. Supplied manufacturer and retailer guides broadly place typical output around 0.5 to 3 amps, although the relevant figure is the rating and behavior of your specific unit. Battery Tender, for example, describes typical low-rate output as 0.5–2 amps, while other commercial battery guidance commonly cites 1–3 amps.
Low output makes charging slow. It does not automatically make the charger safe for indefinite or unattended use. If the device continues supplying current after the battery is full, it must be monitored and disconnected as directed.
Smart charger or maintainer
A smart charger monitors battery conditions and controls its output. Depending on the model, it may change charging stages, reduce current, stop charging, or enter a maintenance mode as the battery approaches full charge.
A maintainer is normally intended to preserve a stored battery’s charge rather than rapidly recover a deeply depleted one. For long-term storage, a chemistry-compatible automatic maintainer is generally more appropriate than an unregulated constant-output charger—but only when its manufacturer expressly permits extended connection in the intended environment.
Standard charger
A compatible standard charger can provide more current than a typical trickle charger and is generally more practical for initial recovery when time matters. Higher output does not mean that the maximum available setting is automatically appropriate. The charger must still support the battery’s chemistry, capacity, condition, and manufacturer limits.
After charging and testing, an approved automatic maintainer may be used for storage.
Jump starter
A jump starter is an emergency starting device. It may provide enough assistance to crank the engine so the vehicle can be moved or taken for service. It is not a substitute for a complete charging cycle.
Even if the engine starts, the battery may remain substantially discharged or may be unable to retain charge. The cause of the no-start also remains unresolved until the battery—and, where appropriate, the vehicle’s electrical system—is evaluated.
Finally, do not treat trickle charger, float charger, smart charger, and battery maintainer as interchangeable labels. Manufacturers and retailers use these terms inconsistently. Check the specifications for output, supported chemistries, charging stages, shutoff behavior, maintenance mode, minimum detection voltage, and permitted connection time.
Why an extremely discharged battery may not start charging
An extremely discharged battery may cause the charger to display:
- “No battery”
- “Check connection”
- A polarity or connection fault
- An error code
- A standby indication without charging current
This does not conclusively prove that the battery is irrecoverable. It may be below that charger’s detection range, the clamps may have poor contact, the wrong mode may be selected, or another fault may be preventing startup.
One commercial guide cites an approximate 8–10-volt detection limitation for some chargers, but that range is neither a universal threshold nor a battery-health test. Different models use different detection logic (GOOLOO’s discussion of low-voltage charger detection).
If the charger refuses to begin:
- Switch it off and consult the fault-code instructions.
- Confirm clean, secure clamp or lead contact.
- Recheck polarity before applying power.
- Verify the selected chemistry and nominal voltage.
- Find the model’s documented minimum detection voltage, if specified.
- Determine whether it has a manufacturer-supported recovery mode.
- Reinspect the battery for heat, leakage, swelling, cracking, freezing, or odor.
Follow the manufacturer-supported procedure or obtain professional battery testing.
Extreme discharge can also cause or accompany lasting deterioration. A battery may eventually accept charge without regaining dependable capacity or starting performance. Charger recognition is therefore only the beginning of the evaluation.
How long trickle charging may take
There is no universal answer such as “overnight,” “24 hours,” or “three days.” Charging time depends on the battery’s capacity, depth of discharge, condition, chemistry and temperature, as well as the charger’s output and control behavior.
For rough planning, use this idealized calculation:
Ideal minimum charging time in hours = amp-hours needing replacement ÷ charger output in amps
This is arithmetic for estimating scale, not a promise of completion. Commercial battery guidance uses the same capacity-to-current approach while emphasizing that low-current charging can take an extended period (R&D Batteries’ charging-time explanation).
The amp-hours needing replacement are not necessarily the battery’s entire labeled capacity. They depend on how deeply it was discharged. Real charging also generally takes longer than the ideal estimate because of energy losses and because an automatic charger may reduce current during later stages.
Worked example: a partially discharged 60 Ah battery
Suppose a 60 Ah battery is estimated to be 50% depleted:
- Estimated deficit: 60 Ah × 50% = 30 Ah
- Charger output: 2 amps
- Ideal minimum: 30 Ah ÷ 2 A = 15 hours
The 15-hour result follows directly from the idealized capacity-to-current formula. Actual charging will likely take longer because the process is not perfectly efficient and the charger may not deliver its maximum rated current throughout the cycle.
Worked example: replacing 50 Ah at 2 amps
For a larger deficit:
- Estimated deficit: 50 Ah
- Charger output: 2 amps
- Ideal minimum: 50 Ah ÷ 2 A = 25 hours
The 25-hour figure is nominal and does not account for losses, temperature, battery condition, or current tapering.
Worked example: why a large deficit can take days
For an idealized 100 Ah deficit with a 1-amp charger:
- Estimated deficit: 100 Ah
- Charger output: 1 amp
- Ideal minimum: 100 hours
One hundred hours is more than four days before real-world adjustments. Battle Born Batteries uses the same 100 Ah at 1 amp example to illustrate the scale of slow charging and describes trickle chargers primarily as maintenance tools (Battle Born Batteries’ trickle-charger explanation).
Planning table
| Situation | What drives the estimate | What to expect |
|---|---|---|
| Partial discharge | Smaller amp-hour deficit | May fit into an overnight period, but not necessarily |
| Deep discharge | Larger deficit and possible deterioration | Could take a day or several days; recovery remains uncertain |
| Very low charger output | Only a few amps or less available | Long charging time even for a moderate deficit |
| High-capacity battery | More energy may need replacing | Potentially multiple days at trickle-charger output |
| Automatic staged charging | Rated maximum may not be delivered continuously | Longer than simple division suggests |
| Cold or deteriorated battery | Charge acceptance may be reduced or irregular | Slower progress and greater need for testing |
A charger’s amp rating is generally a maximum or nominal output, not a guarantee of continuous delivery at that level. Automatic chargers may reduce current as charging progresses, while battery condition and temperature can affect charge acceptance.
Do not use a timer alone to decide whether charging succeeded. Consider the charger’s documented status, the battery’s physical behavior, the manufacturer’s instructions, and post-charge testing.
A safe, model-specific charging workflow
This is a decision framework, not a universal clamp sequence. The applicable battery, vehicle, and charger instructions take precedence.
Step 1: Identify and inspect the battery
Determine the battery’s chemistry, nominal voltage, capacity where available, and visible condition. Stop if it is frozen, leaking, cracked, swollen, excessively hot, or otherwise damaged.
If the battery is difficult to access, do not assume that the visible posts are the correct charging points. Some vehicles provide dedicated terminals or grounding locations.
Step 2: Confirm charger compatibility
Verify that the charger explicitly supports:
- The battery chemistry
- The nominal voltage
- The intended charging or maintenance role
- The battery capacity range, if specified
- Any low-voltage recovery mode you intend to use
Lithium, AGM, gel, and flooded lead-acid settings are not interchangeable merely because the batteries share a nominal voltage.
Step 3: Prepare the vehicle
Switch off the ignition, lights, accessories, and other loads. Inspect the terminals, charger leads, and vehicle cables for damage, looseness, or contamination that could interfere with reliable contact.
Follow vehicle guidance on whether the battery may remain installed, must be disconnected, or requires special handling to preserve electronic settings or battery-monitoring functions. General automotive charging guidance likewise emphasizes turning off vehicle loads and following the charger’s specific instructions (Car and Driver’s battery-charging guide).
Step 4: Prepare the charging area
Position the charger in a stable, dry, suitably ventilated location away from ignition sources. Route the leads to reduce the risk of pinching, abrasion, accidental disconnection, or a short circuit.
Keep tools and loose metal objects away from the battery terminals. Position the charger so heat can dissipate as its manufacturer intends.
Step 5: Connect and energize in the specified order
Follow the exact sequence stated in the charger and vehicle instructions, including any designated chassis-ground point. Check polarity before power is applied.
Generic sequences differ, particularly over whether the negative connection belongs on a battery terminal or a vehicle ground. Vehicle-specific charging points and battery-monitoring requirements take priority.
Step 6: Confirm normal startup
Once energized, verify that the charger:
- Recognizes the battery
- Shows the intended chemistry or mode
- Reports no reversed-polarity or connection fault
- Begins the documented charging stage
- Operates without abnormal noise, odor, or heat
Monitor a manual trickle charger. Low amperage does not eliminate overcharging risk or the possibility of abnormal battery behavior.
Step 7: Monitor progress
Periodically inspect the battery and charger. Stop if you observe excessive heat, swelling, leakage, cracking, abnormal odor, repeated faults, unexpected shutdown, or failure to make the progress described in the manual.
A lack of progress is a reason to reassess or seek testing—not to force the charger to continue.
Step 8: Stop and disconnect correctly
Allow an automatic charger to complete its documented cycle unless the battery or charger behaves abnormally. Then stop and disconnect it in the sequence specified by the applicable instructions.
Do not substitute a generic sequence for vehicle instructions involving designated grounds, battery sensors, or electronic systems. Do not open a sealed battery, add electrolyte to a battery not designed for servicing, apply elevated voltage, or improvise a recovery process.
Can a trickle charger be left connected overnight or indefinitely?
Sometimes—but only when the charger is designed for it, the battery is compatible and undamaged, the environment is suitable, and the manufacturer permits the intended connection period.
A traditional constant-output trickle charger may continue supplying current after the battery is charged. If left connected too long, it can contribute to overcharging, heat, electrolyte loss, leakage, swelling, or internal damage. Battery Tender’s manufacturer comparison distinguishes conventional continuous-output trickle chargers from smart chargers that monitor the battery and regulate charging (Battery Tender’s trickle-versus-smart charger comparison).
A compatible smart charger or maintainer may reduce output, stop charging, cycle as needed, or enter maintenance mode as the battery approaches full charge. That reduces the supervision burden, but it does not make battery condition, chemistry, charger faults, ventilation, or the manual irrelevant.
Use these rules:
- Manual or constant-output charger: Monitor it and disconnect it when charging is complete.
- Automatic charger used overnight: Confirm that its instructions permit the intended charging period and environment.
- Weeks- or months-long storage: Use only compatible maintenance equipment expressly approved for extended connection.
- Damaged or abnormal battery: Do not leave it charging.
- Ambiguous product label: Do not assume “trickle charger” means automatic maintenance capability.
No product should be considered safe for indefinite connection solely because it is marketed as a trickle charger, smart charger, or maintainer.
After charging: test the battery before relying on it
A charger-complete message means the charger finished its programmed process. It does not prove that the battery has regained useful capacity. Likewise, higher terminal voltage or one successful engine start does not establish dependable cranking performance.
A battery can accept charge yet fail to retain it. It may appear full immediately after disconnection, lose charge later, or fail when the starter places it under load.
After charging:
- Disconnect the charger as instructed.
- Allow the battery to settle for the period specified by the battery or test-equipment documentation.
- Check whether it retains charge.
- Confirm that it can provide the required starting performance.
- Obtain a proper battery test if its condition remains uncertain.
Ask a qualified repair shop, battery retailer, or other properly equipped service provider for an appropriate load or conductance test when the battery was deeply discharged, is older, has failed repeatedly, or must be dependable. The test should be performed and interpreted according to the battery and test-equipment documentation rather than a universal online threshold.
Use the result to choose the next step:
- Passes appropriate testing and retains charge: Return it to service while watching for recurrence.
- Results are uncertain: Test further rather than relying on one successful start.
- Cannot retain useful charge or perform under load: Replace it and follow authorized local handling guidance.
- Physically damaged: Do not continue routine DIY charging or testing.
If the battery becomes discharged again, deterioration is one possibility, but not the only one. Poor electrical connections, an unwanted electrical draw while parked, or a vehicle charging-system problem may also require investigation. Recharging alone will not correct those faults.
Finally, judge the battery by the reliability the situation requires. Recovery after an extreme discharge does not guarantee dependable service. Where another no-start would have serious consequences, use appropriate testing rather than assuming that one successful start proves recovery.
Frequently asked questions
Can a 1-amp trickle charger charge a completely dead car battery?
It may charge a deeply discharged battery if the battery remains serviceable and the charger can recognize it. At 1 amp, however, recovery can take several days: an idealized 100 Ah deficit equals 100 hours before accounting for losses or reduced current later in the cycle.
If “completely dead” means physically damaged, permanently degraded, or unable to retain charge, a 1-amp charger will not repair it. If the charger reports no battery, follow its documented low-voltage instructions instead of forcing it to start.
How long should I leave a trickle charger on a dead battery?
Use the charger’s documented completion behavior rather than a fixed universal duration. For rough planning, divide the estimated amp-hours needing replacement by the charger’s output in amps, then allow additional time for losses and current reduction during later stages.
Monitor a manual charger and disconnect it when charging is complete according to its instructions. Do not assume low output makes indefinite connection safe.
Why will my smart charger not recognize the battery?
Possible reasons include:
- Battery voltage below the model’s detection range
- Poor clamp or lead contact
- Reversed polarity
- Incorrect chemistry or voltage selection
- A charger or connection fault
- A damaged battery
- The need for a documented recovery mode
Check the error code, connections, polarity, selected mode, and manual. If the charger still refuses to proceed, obtain professional testing rather than bypassing its safety logic.
Is a battery maintainer the same as a trickle charger?
Not necessarily. A traditional trickle charger commonly supplies continuous low output, while an automatic maintainer monitors the battery and may reduce, stop, or cycle its output.
Because product terminology is inconsistent, judge the device by its documented behavior. For long-term storage, use a chemistry-compatible maintainer whose manufacturer expressly permits extended connection.
Should I jump-start the car or charge the battery first?
If the vehicle must be moved immediately and the battery and vehicle are safe for the procedure, an appropriate jump starter may provide temporary cranking assistance. It will not fully recharge the battery or prove that the battery is healthy.
If there is no urgency, controlled charging followed by testing provides more useful information. A compatible standard charger is generally more practical than a trickle charger when faster initial recovery is needed.